Showing posts with label Techniques. Show all posts

Monday, September 17, 2012

Scrapbooking with Flirty paper

_8297345 you bring a smile to my face (Medium)

Don’t you just love the accents on this page. They draw your attention to the top of the left page and continue on down to the right page and on up to the corner, all in a nice even flow.

These little accents are really easy to make…except they do take a little bit of time to do. You start with a 1 ¼ inch circle punch and double sided paper. Then with the punched circle you fold in the sides to create a square. Then mat on top of another circle. Easy peasy.

All supplies are from Close To My Heart

MIFYH Pattern 13

X7160B Flirty Paper Packet

Colonial White cardstock

Z2173 Slate Ink

Z1311 Circle Punch

Z578 Corner rounder

D1532 Stars Shine Bright Stamp Set


Thanks for stopping by…

Laurie

Saturday, June 23, 2012

Stamping on Ribbon

_3317027 Moments to live for Stella papers (Medium) (Medium)

I know that I am always talking about the Workshops on the Go Kits and the layouts they have instructions for, so today is going to be no different LOL. I used an old Workshop On the Go Instruction pamphlet from the Veranda Kit and used my New Stella Papers and this is the result. The basic Idea is the same but with different papers and embellishments you would never know it was the same sketch.

One other thing that I like to do that I haven’t done in a while is to stamp a saying on ribbon. I have lots of narrow sayings that work perfect for this. I used the sayings that came with the Retro Tech stamp set to stamp “Moments to live for” on the left page and “Picture Perfect” for the right page. Some ribbon works better than others for stamping on but the Color Ready seam binding works great. Make sure you don’t press to hard or the stamp will squish down and become distorted. Also darker inks will help you to see the saying better too.


All supplies are form Close To My Heart unless otherwise noted:

X7147B Stella Paper Packet

Colors are Cocoa, Olive, Tulip, Lagoon and Colonial White

C1446 Retro Tech Stamp Set

Z2114 Cocoa Ink

Z1708 Sparkles flourishes

Z1710 Just Blooms Paper Shapes Flowers

Z1732 Color Ready Seam Binding

Ribbon Slides

Embellishment Brads


Thanks for stopping by…

Laurie

Monday, May 7, 2012

One Page Lucy Layout

_1236548 1st play date (Medium)

I tried my hand at making pinwheel flowers for this layout. They were really simple. First I took a 12 inch strip of patterned paper that was 1 inch wide. I scored it every ¼ inch. Then I accordion folded on the score marks. I glued the ends together. Then I took a scrap of paper about 1 inch and squeezed out a fair amount of Liquid glass on to the scrap of paper. Then I placed the folded paper on top and held it for a few seconds to make a bond. Then I placed one of the new Glitter Flowers onto the center.

One other thing I did was to fancy up the dimensional elements letters and number. To do this I took one of the flourish stamps from The Rock the block set (January 2012 Special) and inked it up with Versamark clear ink and stamped on to the bottom half of the letter. Then I covered the ink in Clear Detail embossing powder and heat set with the heat gun. Then I took my finger dauber and inked it up with Grey Wool ink and rubbed it all over the letters. Where I embossed stayed white and the rest of the letter was colored.


All supplies are from Close To My Heart:

X7149B Lucy Paper Packet

Blush, White daisy and Grey Wool Cardstock

Rock the Block Stamp Set

D1478 Bingo Alphabet

Versamark Ink

Z2125 Grey Wool Ink

Z2106 Blush Ink

Z821 Clear Detail Embossing powder

Z1370 Pink Assortment Buttons

Z1707 Bitty Opaque's Pearls

Z1690 Bitty Buds Assortment

Z679 Liquid Glass

Z1702 Barker Twine Paradise Assortment

Dimensional Elements Monograms D,A,T,E,1

Z726 Finger Dauber

Z555 Craft Heater

1772 Glue Dots

Z608 Embossing Stylus

Z338 Paper Trimmer

Z1686 Art Philosophy Cricut Cartridge

Adhesive

Scissors


Thanks for stopping by…

Laurie

Thursday, March 1, 2012

Card Class

OLYMPUS DIGITAL CAMERA

I taught a class a while back where we made these cards.

Thanks for stopping by…

Laurie

Saturday, February 4, 2012

Embossed Resist Technique

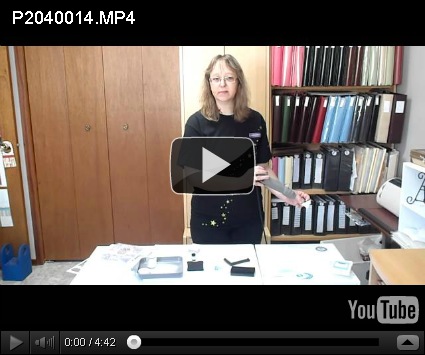
This is my very first technique video.  It is on embossed resist and I hope you watch it and let me know what your thought are. 

Thanks for stopping by…

Laurie

Thursday, January 19, 2012

Art Philosophy Layout

_B105830 cuba horse and buggy (Medium)

I really like this layout. It is not cluttered, has some simple lines and yet looks superb!

For the bracket I used the Art Philosophy cricut Cartridge that is exclusive to Close To My Heart. I cannot seem to say enough about this cartridge. There are 700 different images on it. Couple that with 6 different functions and many, many sizes you end up with thousands of images!  You can purchase the Art Philosophy Here

To make the bracket I used a sheet of 12x12 Pacifica Cardstock and the Square3 button on page 43 (or C3...third image on the third row). I cut this at 10 ¾ inches. I then cut another one using Colonial White cardstock and at 9 ¼ inches. I then layered them and attached them to the layout.

For the Flowers I mixed up a little bit of Sorbet reinker with pearl create a shade paint and painted it on my white flowers.

All supplies are from Close To My Heart unless otherwise noted:

X7141B Elemental Paper Packet

Colors are Pacifica, Sorbet desert Sand and Colonial White

X7141C My Reflections Elemental Compliments Shapes

D1386 Save the Date stamp Set

Z2118 Desert Sand Ink

Z1039 Pearl Create a Shade Paint

Z2264 Sorbet Reinker

Sorbet Ribbon

White Daisy Flowers

Glue Dots

Prima Flowers

Thanks for stopping by...

Laurie

Saturday, January 14, 2012

January Spotlight Blog Hop…Scraps

Welcome to the January spotlight blog hop. If you have come from   Nikki Geers Blog you are on the right track, unless you start here.

_C286409 maddison riding car (Medium)

This month we are spotlighting scraps. Scraps can mean a bunch of things when it comes to scrapbooking but I am going to focus on using the little bits of scrap paper left over from a favorite kit.

For this layout I used a 1.5 inch strip of cardstock and on it placed 1.25 inch squares of different papers that were in my Sofia paper kit to form a focal point across the layout.

One other thing I did was use a scrap of paper that was left over from a class I did. One of the ladies stamped the inside saying of her card in the wrong orientation (horizontal instead of vertical) so instead of throwing out that paper I used the other side to make a mask for my spritzed leaves. To do this I cut out the Leaves from my Art Philosophy Cricut cartridge on the messed up cardstock. I used the negative space for my mask and spritzed it with sweet leaf reinker mixed with rubbing alcohol. So, another great way to use up your scraps.

And another thing I do with any leftover little bits of paper I have is I either cut something out of it using the Art Philosophy Cartridge or I use my punches to punch out a shape. I have these left over images stored in a little sand pail at the moment. I may find a better place for them sometime but the sand pail works for now.


_C166092 maddison riding car blog hop (Medium)

All supplies are from Close To My Heart

X7131B Sofia Paper Packet

White Daisy, Hollyhock and Pear Cardstock

Z2197 Pear Ink

Z1686 Art Philosophy

D1482 Love Life Stamp Set

D1386 Save the Date Stamp Set

Z1370 Pink Buttons

Z1336 Cream Pearls

Z1092 Pink Embroidery Floss

Z817 Just Blooms Flowers

Now you can continue on your hop by going to  Wendy’s  BLOG.


Thanks for stopping by…

Laurie

Thursday, January 5, 2012

Winter Wonderland


_A185727 always believe (Large)


Did you know that you can add a little bling to the My Stickease? You sure can. You can alter them too.

For this layout I used the Wonderland Stickease that matched the Wonderland paper. Just one more reason I LOVE Close To My Heart…they make everything match! For the border along the top Right hand side and bottom left side I cut the border strip to the length I wanted then attached it to Grey Flannel cardstock. It makes it stand out just a little bit more. And I dressed up the snowflake Stickease with Silver Glitter Glitz in the centers. Also on the snowman and kids Stickease I accentuated the fur and top hat with the Silver Glitter Glitz as well. Something as simple as that adds quite a bit of bling.

I also used our NEW Clear Ruler to add some Designer Brads along the border on the left page. Our ruler comes with grid marks and guide holes to make placement evenly spaced. You will never have any more crooked brads! Just use your piercing tool in the guide holes and you have marked where your brads should be. These holes are also great for stitching, button placement and many other uses. Get one today and try it for yourself. You will not be sorry.

All supplies are from Close To My Heart

X7146B Wonderland Paper

X7146C Wonderland Stickease

Z1349 Designer Brads Shimmer

Z4168 Top Coats Icing

Z1482 Glitter Glitz Silver

Z1471 Clear Ruler

Z2124 Grey Flannel Ink

Z726 Sponge Dauber


Thanks for stopping by…

Laurie

Monday, January 2, 2012

Happy New Year and a Christmas Layout

_C036041 Christmas Time Believe WOTG (Large)

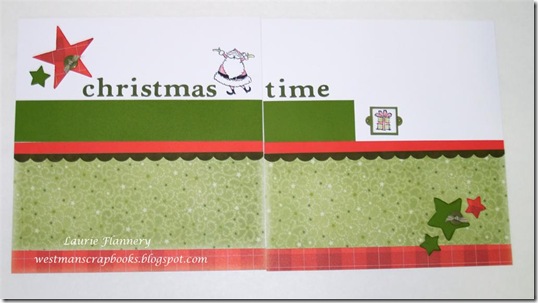
I hope everyone had a fabulous Christmas and New Years!  I know I did.  I also enjoyed this fantastic weather we are having.  I did get to make a few layouts during the holidays too! 

I like the straight simple lines of this layout. Sometimes layouts get too busy and have too much going on and take away your attention on the photos. After all, we scrapbook to showcase our photos and story. So this layout keeps your attention on the photos first, then on the design of the layout. I will add my photos as soon as I get them back from the developer. 

Here are a few things I did on this layout:

· I stamped the Santa Image onto the layout with Archival Ink and then colored it in using my water brush and Holiday Red ink and Topiary Ink. My water brush was on the dry side so the archival black ink did not run.

· I traced the Dimensional Elements Stars onto my patterned paper, cut them out then used liquid glass to adhere the stars to the paper. I sanded the edges with my finishing files then finger daubered ink around the edges.

· I cut out my title on my cricut using the Art Philosophy Cartridge. Size was 1 inch.

· I placed the frame around the present.

· I inked our Color Ready Kraft Borders with New England Ivy Ink and attached them to the layout.


Supplies are From Close To My Heart unless otherwise noted:

X7145B Believe Paper

Believe WOTG Stamp Set

Z1377 Color Ready Kraft Borders

Z1489 Olive Mini Medley Accessories

Z1680 Dimensional Elements Stars

4475 Archival Black Ink

Z2135 New England Ivy Ink

Z2155 Topiary Ink

Z2127 Holiday Red Ink

Z1686 Art Philosophy Cricut Cartridge

Others: water brush, Finger daubers, adhesive, glue dots, finishing files, liquid glass, paper piercer,


Thanks for stopping by…

Laurie

Monday, April 25, 2011

Pontoon Fun


I love this sketch from the Magic How to Book. It is called On With The Show. It is a very simple layout, one that doesn’t use a whole lot of paper too! Another plus of this sketch is that it uses 4x6 photos. Lots of my customers only have 4x6 photos as they get them printed out at places like Wal-Mart or Superstore and do not have their own photo printer at home to use.

One thing I did do on this layout is to color the Color the chipboard letters that spell Oak Lake. First, I colored the top part with sweet Leaf ink using my finger dauber and rubbing in tiny circles all over the top of the letters. Next I used Crystal Blue in and did the same thing in the middle part of the letters. Lastly, I finished them off by applying Indian Corn Blue to the bottom of the letters using the same technique with the finger dauber. This gives a nice tri-color appearance. Just remember to start with the lightest color and work your way to the darkest color.

All supplies are from Close to My Heart unless otherwise noted:
Magic Sketch – On with the Show
Emporium Paper Packet X7105B
Colors are Crystal Blue, Indian Corn Blue, Sweet Leaf and Colonial White
Exclusive Inks Sweet Leaf Z2153
                      Crystal Blue Z2117
                       Indian Corn Blue Z2130
Stamp Sets: Bohemian Alphabet E1019
     Express Postage D1262
     Save the Date D1386
     June Word Puzzle D1288 (retired)
     Boutique Borders D1332
Circle Window Charms (retired)
Buttons Blue Assortment Z1371
Buttons Green Assortment Z1372
Sparkles Blue and Green Assortment Z1327
Sparkles Clear Bitty Z1263
Dimensional Elements Monograms Assorted Letters

Thanks for stopping by…
Laurie

Monday, March 14, 2011

March Blog Hop...Techniques

Welcome to the March Blog Hop...scrapbook techniques. If you have just came from Corina Mitchell's site you are on the right track. 

 In this layout I chose to do some embossing.  This is fairly simple to do.  First you ink up your stamp with Versamark.  This is a "sticky" clear ink pad that stays wet a little longer than a regular ink pad.  Then you sprinkle your embossing powder onto the wet versamark ink.  Swoosh the embossing powder around until the entire image has embossing powder on it.  Then you tap off the excess powder and return it back into the bottle so there is no waste.  Next, you heat the image with your heat gun until the powder melts and turns shiny.  And then you are done!  On the above layout I embossed the design on the Christmas Ornaments on the left page and the snowflakes on the right page.  Also on the right page on the frame that surrounds the photo of me and my granddaughter I embossed it as well.

 To do that I took the Versamark in my right hand and swiped the edges of the cardstock frame on all four sides leaving a random pattern around the frame. Then I sprinkled the embossing powder around and heat set it just like I did when I used the stamps.  This gives a unique frame around the picture.

All supplies are from Close To My Heart unless otherwise noted:
Supplies:

Adorn-able D1446
December Word Puzzle D1313
Moments In Time D1339
Versamark
Craft Tray
Gold Embossing Powder
Cranberry and New England Ivy Ink
Cranberry and new England Ivy Finger Daubers
Omega Nylon Christmas Thread
Scotch tape for Masking


Now you can hop on over to Haley Dyer's blog here and see what technique she will feature! 
Thanks for stopping by...
Laurie

Monday, January 17, 2011

January Technique Class

These are the cards I will be teaching at the January Technique Class.  We will make all 3 cards and you will get full instructions on how to do the techniques.  Class will be held on Sunday January 30th at 2pm.  Cost is $10.  You must pre register by January 27th to reserve your spot! 

Thanks for stopping by...
Laurie

Sunday, October 31, 2010

Happy Halloween!

Happy Halloween.  I just love Halloween, I decorate my house at the beginning of September so I can enjoy them longer!  It is my favorite occasion to decorate my house in...yes I like it even better than Christmas.  LOL 
I also just these little monsters.  They are sooooo cute!  They also make me smile when I look at them.  Haha.  I like to color or paint so when I first seem this stamp set I knew I wanted to color them with my Blending pen. 
This is very easy to do but it does take a little practice ...just like anything else.  You can see the blending pen here
First off I stamp my image with Black Archival Ink.  This will not bleed when you use the blending pen with it.  If you use just regular dye based ink your ink will bleed into your coloring and you will have a mess.  So, use archival ink.  Staz On would work too.  For the color I take the Gypsy (or any other color I am working with) and squeeze the ink pad together to transfer some of the ink to the lid of the ink pad.  Then with my blending brush I pick up a small amount of ink from the lid of the ink pad and start coloring my image working from the outside towards the inside.  Then I pick up more color and continue the process until I am satisfied with the coloring.  To clean my blending brush swipe it on scrap paper until no more color comes off the tip and then you are good to use it on another color.  This will take some practice as the amount of ink you pick up will determine how dark your coloring is...if that makes sense?  So to get your shading right you will have to practice...but do not give up...it works great! 
Anyhow here is the items I used for the cards...All supplies are from Close To My Heart unless otherwise noted. 

Let's Party Clear Card:
Clear Card Z1309
Hooligans Paper Packet X7129B
Party Animal Stamp Set D1437
Black Ribbon
Blending Pen #3174
Pear, Gypsy and Sunset Ink
Nesties Circle and Scalloped Circle
Corner Rounder #Z578
Black Archival Ink #4475

Party Animal:
Hooligans Paper Packet X7129B
Party Animal Stamp set D1437
Black Ribbon
My Legacy Writer Black Pen #4275
Black Archival Ink #4475
Blending Pen #3174
Pear, Gypsy and Sunset Ink
Martha Stewart Spider Web Punch

Waving Monster:
Same supplies are above but also includes the Nesties Circles and Inverted Circles 

Friday, September 10, 2010

September Technique Class

Technique Class:  Sunday September 19th at 2pm.
                            My House
                            Cost $10
For this I have 8 spots total and they fill up fast.  I will take pre registrations until Saturday Sept 18th as my open house is that day. 
Techniques you will learn are:  Using the Edge Distresser
                                                Painting with Reinkers
                                                Sandpaper Stipple. 
Remember to book your spot soon! 

Thanks for stopping by...
Laurie

Friday, July 23, 2010

Summer Splendour Art and Soul TV!

There is a new episode of Art and Soul on Close To My Heart TV! In this episode you will discover how to mask some images on your stamp so that only the part you want gets inked. Watch it here

You will also get to see a visual of how to use the corner rounder to make scalloped edges on your paper. My last post explained how to do this but now you can see a quick visual of it being done.

Are the Clear Cards that Close To My Heart sells not brilliant! These are really fun to make and on this episode of Art and Soul there are some tips on how to use the clear cards.

Another fun technique is making paper flowers using the circle punch. You will see how to make these wonderful flowers and get all the paper measurements.

One last tip that Close To My Heart has on the Art and Soul episode is how to make mats on our Digital Software...Studio J. This is a free software that you can play with FREE and you only have to pay for the layouts you print. This is very user friendly and can do things like whiten teeth, remove red eye and blemishes and to make your photos black and white or sepia...just to name a few of the different techniques that can be done on Studio J. Go ahead, and try it...it won't cost anything until you print them. Try it FREE Here

Now off to watch the latest Art and Soul TV

Thanks for stopping by...
Laurie

Wednesday, April 21, 2010

April Technique Class

Here are the three cards we will be making for this months Technique Class. We are going to do Chipboard Embossed resist, Border Punch Ovals, and Punched Circle Flowers. Class will be held on Sunday April 25th at 2pm. I have 2 spots left if you would like to attend. Please call ASAP as these spots will go fast.

Thanks for stopping by...
Laurie

Saturday, March 20, 2010

Technique Class

Once a month I teach a technique class. You will be given written instructions for all the techniques. We will make a 3x3 sample of the technique that you can paste onto the instructions to always give you a visual of the technique, then we will make a greeting card using that technique. At each class you will learn 3 different techniques too. These classes are very affordable at $10 and space fills up pretty fast. My next class will be held on Sunday March 28th at 2 pm. Call me to reserve your spot.

The technique we did on this card is called sanded serendipity. Pretty cool huh? Remember, you will learn lots at technique class!

Thanks for stopping by...
Laurie

Wednesday, February 10, 2010

Turning 40


Turning 40...it never bothered me to jump up from being in my 30's to being in my 40's. Age is only a number and is reflected in how old you feel. And I know that was a few years ago too, but I just got around to scrapbooking it.
For this layout I colored the Colonial White Ric Rac with my Copic Marker. I really like to do this as it saves in supplies ...you only need white or cream embellishments and you can color to match anything you have. I did color both sides of the ribbon to make it a uniform color.
I also took my journalling pen and made faux stitching around the stamped images, journalling and one of the pictures. I think it gives the layout just a little bit more pizazz.
If you are interested in the Copic colors that match Close To My Heart colors let me know and I can email you my color chart.
All supplies are Close To My Heart unless otherwise noted.
Bella Paper Pack X7114B
Colors are Desert Sand, Smokey Plum, Vanilla Cream and Olive.
Endless Friendship Stamp Set D1354
Just Blooms Daisy (retired now)
New England Ivy Big Brads Z1215
Black Journalling Pen 4275
Colonial White Ric Rac Z1154
Copic Marker BV17
Byington Computer Font.

Saturday, February 6, 2010

Perfectly Beautiful Little Girl

This is another layout of "My perfectly beautiful little girl". I scraplifted parts of this layout from another Close To My Heart consultant but I cannot seem to remember who it was or from what blog. I guess I need to get a 'system' to keep track of where I find things on the Internet.
For this layout I wanted my buttons to match the papers so I punched some circles out of patterned paper and a larger size of circle out black cardstock, and matted the two together. Then I placed a circle window charm on top. Then I attached it to the flower with a glue dot.
All supplies are Close To My Heart unless otherwise noted.
Notebook Paper Packet X7102B
Colors are black, crystal blue, hollyhock, bamboo, and desert sand.
Just Blooms Big Pinks Z1033
Black Ribbon Z1034
Window Charms Circles Z819
Black Journalling Pen 4275

Thanks for stopping by...
Laurie

Friday, January 29, 2010

Paper Pleats

Finally a card! It seems like I haven't made a card in like forever. It is funny how you go in stages and lately I have been in a scrapbook frenzy. There are so many pictures of my family that were taken last year. And my heart is really about scrapbooking...but card making is fun too.
On Sunday I will be teaching a technique class and this is one of the cards that we will be doing. While the card has a few different techniques, the one we will be focusing on is the paper pleat at the bottom. While I won't be giving instructions here, you can attend the class and get written instructions as well as practicing on a sample piece before you make the card. We will also be doing two different techniques as well...sanded serendipity and dying paper flowers. You must attend to get a look at these cards. I only have two spots left if you would like to attend. Give me a call.